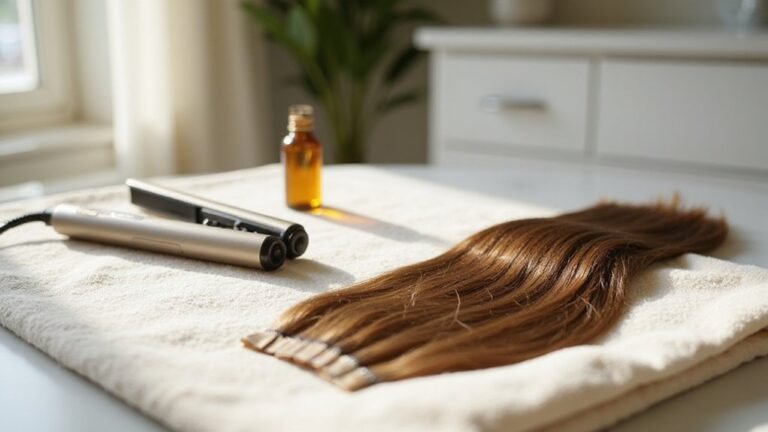
Removing glue from a lace front wig can be tricky, especially if you’re worried about damaging the delicate lace. The key is to soften the adhesive safely without pulling or scrubbing harshly.
You’ll learn techniques like using alcohol and gentle water soaks to make the process smooth and effective. Keep reading for all the tips to get your wig looking fresh again.
Why Adhesive Remover Works Best for Lace Glue Removal
Adhesive remover works best for lace glue removal because it targets the chemical bonds within the adhesive rather than just softening its surface. This precise chemistry allows it to penetrate the mastic and alter its molecular structure, leading to a cleaner, more complete breakdown of even stubborn, built-up residue. As a result, you don’t need to rely on harsh scraping that can tear delicate lace or monofilament bases. Instead, the remover dissolves the adhesive from the inside out, loosening its hold without applying excessive force. Understanding this principle is similar to grasping how targeted treatments like derma rollers avoid surface trauma while promoting deeper renewal. Starting with a gentle application ensures that the chemical has enough time to work through the layers of built-up residue without requiring extra pressure.
Applying the chemical directly to the glue line lets the remover work through the mesh and attack residue precisely where it’s needed. This method makes removal gentler and more effective, helping to maintain the integrity of your wig. You won’t have to yank or pull; simply wait for the adhesive to lose its grip, then wipe away the softened residue with a soft cloth. This controlled process results in less damage and a cleaner, safer removal overall. This approach is similar to how derma rollers work, using targeted action to avoid surface trauma while achieving deeper results.
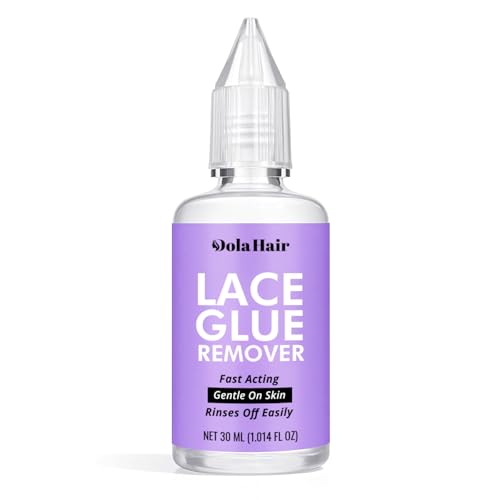
Dolahair Lace glue Remover can remove adhesive residue from a variety of cosmetic bonding products and can be used for all tape-in hair extensions including skin wefts damaging the hair, skin or scalp.

Quick & Easy Removal: Effortlessly removes lace wig glue, tape-in extensions, and adhesive residue in under 5 minutes, without the need for harsh scrubbing or excessive effort.

Package Included:1.28 fl oz wig glue + 1 fl oz wig glue remover + 0.56 oz hair wax stick flower scent + 1.05 oz edge control wax + 2 pcs elastic bands+ 2pcs hair dual brush + 2pcs wig caps. (Notice: The date printed on the wig glue bottle is the production date, and the shelf life is two years)
The 7 Essential Tools for Lace Glue Removal
The seven tools are essential for efficient and safe lace glue removal. Start with a soft-bristle toothbrush; its gentle circular motions lift residue from lace edges without tearing delicate Swiss lace. Cotton pads, balls, and swabs allow you to dab and wipe precisely, ensuring remover is applied evenly while preventing over-saturation. A microfiber cloth is the best for smooth wiping because terry cloth can snag lace loops and cause damage. You should allow the remover to sit for approximately 10 minutes after initial application to ensure the adhesive softens fully. Use a blunt-edged scraper, such as a butter knife, to gently lift dried excess glue after softening it. This reduces the risk of tearing. For cleaning, utilize wig-safe products like gentle shampoo and warm water, which loosen residue without harming knots or lace fibers. Always perform a patch-test with any solvent on a small lace section first to check for discoloration and ensure the remover will not weaken the adhesive bond. Additionally, mastering the application of a wig cap helps create a smooth base that minimizes glue exposure on the lace. Finally, a wide-tooth comb helps with post-removal detangling, keeping your lace intact and looking neat. For especially stubborn spots, follow the same softening and lifting steps used for tape extensions to avoid damaging the lace base. Unlike rigid tattoo machine needles, your soft-bristle toothbrush provides gentle agitation without puncturing delicate fibers.
Soften Glue With Alcohol or Heat Before Wiping
To effectively remove glue from your lace, you need to soften it first using either isopropyl alcohol or gentle heat. Applying 91% to 99% isopropyl alcohol is best, as it breaks down the adhesive faster. Use a dab or saturate the glued area, then wait between 1 to 20 minutes until the glue turns into a jelly-like consistency. This prevents you from tugging or forcefully pulling, which can cause hair shedding or damage to the lace. For best results, ensure your setup includes a clean workspace with cotton swabs and a soft cloth ready before you begin, similar to preparing your tools before starting any detailed application process.
Alternatively, applying gentle heat can loosen the adhesive. Use a warm water soak or a heated cloth—never direct heat—paired with a soft pad rather than scraping. Both methods make wiping away the glue easier and help preserve your wig’s edges. Once the adhesive softens, lift it with an alcohol-dampened cloth, using fresh sections to avoid re-depositing glue. Controlled, gentle wiping is key; avoid scrubbing to keep your lace intact. However, avoid using rubbing alcohol as it dries skin and causes unnatural wig tan lines. For a longer-lasting look, consider tape hair extensions as a gentler alternative to adhesive wigs. Red light masks may also help soothe irritated skin after adhesive removal.

Tape in Extension Remover with Faster Action: Our fast-acting wig glue remover spray gently dissolves adhesives in under a minute. The precision mist targets tape in remover needs for lace fronts, clips, or bonded extensions

FAST, RESIDUE-FREE CLEANING: Removes oils and dirt instantly for cleaner bonding surfaces; ideal for prepping wig installs, lace systems, toupee applications and hair tape areas.
Wipe Away Lace Glue in One Direction (Not Back-and-Forth)
When wiping off lace glue, move your dry cloth from the back of the lace toward the hairline in a single, continuous direction. Avoid using a back-and-forth rubbing motion. This technique is like gentle fabric cleaning—only in one pass—to loosen the adhesive. A single-direction swipe helps the glue roll up instead of smearing across the delicate lace fibers. This method not only saves time, often completing the task in 3 to 5 minutes, but also minimizes stress on the lace. Use a dry microfiber cloth or washcloth for controlled, gentle contact, and keep your pressure moderate. If residue stays behind, don’t scrub harder. It will lift more easily with shampoo or alcohol later. This careful handling reduces the need for frequent upkeep of the lace wig, similar to how a skin pen requires less maintenance than traditional microneedling. Using a controlled motion also prevents the lace from stretching, much like how proper arm support stabilizes the skin during a tattoo session. Your main goal now is lifting the adhesive buildup without damaging the lace, and this first pass sets the foundation for the steps ahead. Braid back the hairline before starting to keep the style secure and out of the way during the process. Beginners may find it helpful to start with a high-quality wig cap underneath, as proper underlayer support reduces direct glue contact with the scalp.
When to Soak the Lace in Warm Water and Dish Soap
Once the loose glue has been scraped away with a dry cloth, you may still notice sticky residue on the lace edge. This is when a targeted soak helps soften remaining adhesive without submerging the entire wig. Fill a bowl with warm water and add a single drop of dish soap. Submerge just the lace for 5 to 10 minutes, keeping the rest of the wig dry. This process loosens stubborn adhesive while preventing damage to lace or knots. If residue remains after the first soak, a second short soak is more effective than forcibly scrubbing or scraping. After soaking, gently press out excess water and let the lace air-dry on a wig stand. Using this brief, controlled soak with dish soap provides a safe, gentle way to remove problematic glue without risking tears or damage. For comparison, when using a derma roller on skin, needle size changes the recommended frequency of usage. This technique is similar to how tape-in extensions are safely removed with a gentle adhesive remover rather than harsh pulling. Just as a derma roller requires controlled pressure to avoid skin trauma, this soak method relies on patience rather than forceful scrubbing.
Try Coconut Oil for Stubborn Glue on Sensitive Lace
Coconut oil is an effective, gentle alternative for removing stubborn glue from sensitive lace front wigs. To use, apply a small amount directly to the adhesive area with a cotton swab and let it sit for five to fifteen minutes. After the oil has penetrated, gently massage the area in slow circles to loosen the bond. Wipe away the residue with a soft cloth, and if any glue remains, repeat the process rather than pulling or scraping. This method minimizes chemical exposure and reduces the risk of damaging delicate lace fibers. Once the glue is removed, wash the lace with a mild, sulfate-free shampoo to eliminate any oily film. Remember to use gentle pressure throughout the process to protect the lace’s knots and prolong the lifespan of your wig. Using a derma roller before application can stimulate the scalp, but the same consistent application technique used for treatment is critical for achieving results. After removal, blow-drying hair to prevent odor and mold from residual moisture is also important for maintaining overall hair health. For tough residue, using a soaking method with coconut oil overnight can further soften the adhesive without harsh scrubbing. Additionally, always perform a patch test on a small section of the lace before full application to ensure the oil does not cause discoloration or damage.

Painless Hair Dissolving for Delicate Areas: Say goodbye to the nicks, cuts, and razor burns from traditional shaving. Formulated to dissolve fine to coarse hair deep at the root, this gentle hair remover offers a smoother, longer-lasting alternative for women seeking flawless skin without the discomfort of waxing strips.

FFAST ACTING WIG REMOVER SPRAY: Our wig remover spray can easily and gently remove your wig. It can be 60 seconds without damage and taking off tape extensions as little as 3 minutes without pain. It can also be used to clean up any adhesive left on your hairline, making it a cleaner and faster way to remove your wig

Say goodbye to sticky fingers and hair! Our Tape-in Remover is specially designed to easily remove Tape in Adhesive with little to no residue.
Use Acetone Only as a Last Resort for Synthetic Lace
Use acetone only as a last resort for removing stubborn glue from synthetic lace. It is a powerful solvent that can dissolve synthetic fibers and weaken delicate lace structures. When applying, use just a tiny amount to soften the adhesive; do not soak or submerge the lace. Keep dwell time limited to one minute, then gently wipe away the softened glue. Reapply only if necessary, and never overuse this method to avoid damaging your wig beyond repair. For routine cleaning, soak lace bit by bit in alcohol instead of using harsh solvents. Prioritize safety by working in a well-ventilated area, as acetone fumes can cause irritation and discomfort. Always wear gloves to protect your skin, and keep the solvent away from your scalp. Proper storage is essential: always cap the bottle tightly and store it away from heat sources or open flames, since acetone is highly flammable. Use this method only when gentler removers fail, treating it as a delicate exception rather than routine maintenance. Understanding the pigment grinding process helps explain why gentler adhesive removers are often safer, as they avoid disrupting the delicate fiber structure that holds the lace together. For those seeking a reliable alternative, the best tape hair extensions often rely on adhesives designed for easy release without harsh chemicals.

[Versatile and Quick Nail Glue Remover] - This glue remover not only dissolves regular nail glue, but also removes regular nail polish, nail adhesion tapes for press on nails, semi-cure stickers,and stains by marker pens.Warm tips-it can't remove any gel-base product like gel glue, gel nail polish or rhinestone gel which requires LED/UV nail light curing
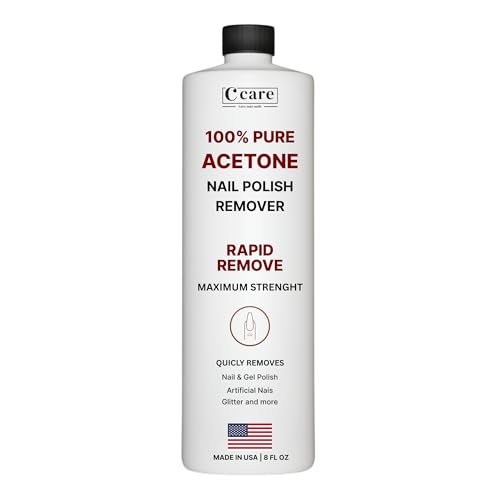
100% Pure Acetone: Exceptionally efficient and powerful for swiftly removing all varieties of nail polish, such as gel, glitter, and long-lasting formulas, with ease.

Shampoo Cleans to Reveal Natural Shine
Rinse, Condition, and Air-Dry the Lace After Cleaning
After acetone has been used, rinse the lace thoroughly with lukewarm water flowing from the roots to the ends until the water runs clear and you cannot feel any residue. This ensures that all traces of acetone are removed and prevents buildup. After rinsing, apply a hydrating conditioner to the mid-lengths and ends of the hair, avoiding the lace base. This step restores softness and helps maintain moisture after cleaning.
Rinse the conditioner completely to prevent product buildup near the lace, which can cause stiffness or dullness. Gently squeeze out excess water by pressing downward from the base to the ends—never twist or wring the hair, as this can cause damage or tangling. Place the wig on a stand or mannequin head and let it air-dry for 12 to 24 hours. Make sure the lace area is fully dry before applying any heat styling tools. Remember, heat can damage damp hair, and a completely dry lace front makes it easier to inspect for leftover glue or residue.
Avoid These Mistakes That Tear Lace or Loosen Knots
Pull glue slowly and gently when cleaning adhesive off a lace front wig. Forceful yanking, vigorous scrubbing, or trimming too much lace can cause permanent damage, especially along the delicate front hairline and ear tabs. To avoid fraying the mesh or warping the perimeter, tug only with a gentle, steady pressure. Be cautious with trimming—removing too much lace diminishes the material you can replace and increases the risk of tearing. When drying, press gently with a soft towel instead of rubbing vigorously, which can weaken fibers. Use only medical-grade, pH-balanced adhesives and solvents designed for lace wigs. An included HD lace repair kit provides needles, thread, pins, clips, fake scalp, and a replacement frontal for easy fixes. Harsh chemicals and incompatible adhesives can degrade the fibers over time. Near the front hairline, avoid aggressive plucking or brushing, as this loosens knots and creates holes. Slow, careful removal and handling are key to preserving your lace’s integrity and ensuring the wig can be reused multiple times.