Removing tape extensions at home without damaging your hair can be tricky, but it’s possible with patience and the right approach.
The key is to loosen the tape bonds gently so your natural hair stays healthy and intact. With a few careful steps, you can remove your extensions smoothly and damage-free.
In this guide, you’ll learn how to safely break down the tape bonds and clear away any residue, all while keeping your hair strong and healthy.
Keep reading to find out how to do it right.
How to Remove Tape Extensions Step by Step
To remove tape extensions safely at home, follow a step-by-step process. Start by sectioning your hair and isolating a single tape bond. Use clips to keep the surrounding hair out of the way so the bond remains visible. Work on one piece at a time in front of a mirror to minimize pulling and ensure precision.
Next, apply a remover designed for tape extensions or isopropyl alcohol directly onto the tape. Saturate the top to allow the solution to seep into the adhesive, then let it sit for a moment—avoid peeling prematurely. Use a rat-tail comb to gently pry open the tape sandwich, creating a pocket for more remover. Massage the solution into the bond to loosen the adhesive. Since the solution is a mix of alcohol and mineral oil, it helps dissolve bonds with less fuss and mess. Carefully lift the extension, peeling off the top layer first. If resistance occurs, reapply the remover instead of forcing the peel. Unlike lace front gluing, which requires a strong hold on the hairline, tape extension removal focuses on gentle dissolution to avoid breakage. This method mirrors the micro-needling process performed by a derma roller, which uses tiny needles to create channels that enhance product absorption. Take your time with this step to prevent unnecessary stress on your roots, as rushed removal is a common cause of premature shedding.
Once separated, use a comb to remove any leftover residue from your natural hair. Finish by washing your hair with a clarifying shampoo to ensure all adhesive remnants are gone. Proper removal helps protect your natural hair, making it easier to match hair color later or recycle your extensions safely.

Perfect for Tape-in Hair Extensions Removal: Specifically designed to effectively remove tape-in hair extension glue while being gentle on your hair and skin, ensuring a safe and easy removal experience

Easily Remove: WENNALIFE tape remover comb features ultra-fine rounded stainless steel teeth to gently remove sticky tape residue without pulling or damaging hair. Helps effectively remove adhesive residue from hair, leaving it smoother and cleaner after use

FAST-ACTING HAIR EXTENSION REMOVER: our hair tape in extension remover solvent is specifically designed to quickly and easily remove hair extension glue while being gentle on your skin and hair. Our oil-based rapid remover is suitable for sensitive scalps and will get your hair extensions to tape out without any pulling or damage. our adhesive tape in remover is formulated using citrus oils and extracts that will work on any style of tape in extensions or soft bonds
What You Need for Safe Tape Extension Removal
To remove tape-in hair extensions safely, you’ll need a few essential supplies. Start with an adhesive remover that is either oil-based or alcohol-based, specifically formulated to dissolve tape glue without pulling or damaging your natural hair. This step is crucial for protecting your scalp and hair strands during removal. To avoid unnecessary breakage, always follow the manufacturer’s removal instructions for the specific adhesive remover you choose.
Next, grab a rat-tail comb to gently open each tape sandwich, making it easier to lift the extensions away from your hair. Sectioning clips are helpful for keeping different hair areas separate and out of the way. Wearing gloves maintains cleanliness and prevents oils from your hands from transferring to your hair or adhesive.
Prepare clean towels and a protective gown to catch any drips or mess. A clarifying shampoo should be on hand for after removal to thoroughly cleanse your scalp and hair. If any stubborn residue remains, a low-heat hair dryer can help soften the remaining adhesive, making cleanup easier. Avoid using improvised solutions like coconut oil, which are less effective and take longer to work.
With these supplies ready, you can remove your tape-in extensions efficiently and without damage. Applying the same principle as derma roller aftercare, gentle handling of the scalp after removal will promote healthy regrowth.

FAST-ACTING BOND REMOVER: Dissolves wig tape, extension tape, and adhesive residue for lace systems and tape in hair extensions human hair; ideal for daily wearers needing quick cleanup.
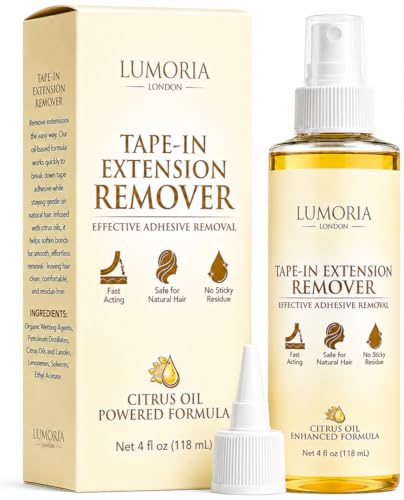
FAST-ACTING HAIR EXTENSION REMOVER: Loosen tape tabs, wig glue and sticky adhesive bonds quickly without stressful pulling or tugging. This tape in hair extension remover helps release extensions smoothly, making removal easier for at-home users, stylists, wig wearers and regular extension maintenance - without damaging your natural hair.

FAST-ACTING HAIR EXTENSION REMOVER: our hair tape in extension remover solvent is specifically designed to quickly and easily remove hair extension glue while being gentle on your skin and hair. Our oil-based rapid remover works well for sensitive scalps and will get your hair extensions to tape out without any pulling or damage. our adhesive tape in remover is formulated using citrus oils and extracts that will work on any style of tape in extensions or soft bonds
How to Prep Your Hair Before Removal
To prepare your hair for removal, start with clean, completely dry strands. Use a clarifying shampoo to remove product buildup, dirt, and oils that can interfere with adhesive control. Heavy conditioners or oils should be avoided because they make the adhesive harder to grip, increasing the risk of tugging or damage during removal. If you are concerned about color fading, opt for color-safe clarifying products to protect your shade. Keep your roots free of scalp oils by avoiding product application near the scalp, which ensures better adhesion and reduces visibility of residue. Section your hair into manageable parts with clips to improve visibility and minimize snagging. Also, detangle knots beforehand to lower mechanical stress on your strands and make the removal process smoother. Proper organization during prep isolates each tape bond, helps prevent tangling, and ensures your hair stays healthy throughout the removal process. For best results, the microdermabrasion tips diamond technique can help exfoliate the scalp and remove buildup before removal. For beginners, choosing a high-quality wig cap can help protect your natural hair underneath during extended wear. Use a specialized remover to dissolve the tape adhesive before detaching the extension. Understanding the pigment binding process used in ink manufacturing helps explain why certain solvents are needed to break down adhesive bonds.
How to Soften and Separate Each Tape Sandwich
To soften and separate each tape sandwich, start by applying an alcohol-based remover or a light oil such as coconut or argan oil directly to the tape seam. Let it sit for a few minutes to allow the adhesive to penetrate and loosen. Use a rat-tail comb to gently split the tape sandwich down the middle, creating a small opening. Reapply the remover into this new seam to help dissolve the bond further. Begin peeling gently from the corners or edges where the adhesive is easiest to lift. Maintain steady tension by pulling slowly and steadily, avoiding any ripping or yanking. If you encounter resistance, reapply the softening agent before continuing. Stop immediately if you feel hair pulling, and add more remover if necessary. Using minimal force and reapplication helps prevent hair breakage and keeps your natural hair safe throughout the process. For best results, always use a quality remover designed specifically for tape-in extensions.

EVERYTHING YOU NEED TO REMOVE TAPE INS: Big Kizzy Remover 1 (8oz) + Remover 2 (4oz) system is unlike any other tape in extension remover! One hair extension remover spray and one hair extension adhesive residue solvent, this dynamic duo makes removing tape ins easy for stylists and DIYers. MADE IN THE USA!
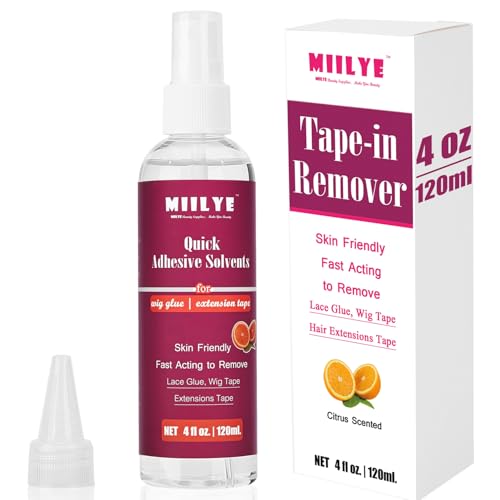
[Fast Acting Tape in Extension Remover] MIILYE tape in remover is designed for damage-free removal of lace front wigs and painless taking off tape in hair extensions, our upgraded tape in extension remover formula facilitates fast removing wig glue adhesive in 60 seconds and tape in extensions as little as 3 minutes;

【WENNALIFE Plastic Scrapers Non Scratch】WENNALIFE Tape Remover Scraper Tool is a high-quality plastic razor blade scraper designed for efficient tape removal. This durable plastic and robust construction ensures longevity and reliability during tape and adhesive removal tasks, allows reusable without wearing out or breaking concerns. Vibrant hue scraper adds a fun and stylish element to your beauty tools, making it a reliable choice for both professional and DIY users.
What to Do When the Tape Won’t Release
If your tape extensions won’t release even after softening, stop pulling immediately and switch tactics. Forcing the bond can cause significant hair damage and frustration. The best approach is to use a proper tape-extension remover, ideally the brand’s own product. Saturate the tape bond thoroughly with the remover, ensuring full coverage. Wait at least 30 seconds to allow the adhesive to soften and release. Don’t skimp on the solution—more is better, as it makes separation easier. Gently lift one corner of the tape, holding both pieces together to avoid pulling on the hair. If resistance persists, reapply the remover rather than tugging harder. Work carefully on one piece at a time to maintain control. If repeated attempts still don’t release the tape, it’s best to seek professional help. A stylist uses stronger, professional-grade removers and techniques that prevent unnecessary damage to your hair. Never force the removal—stubborn tape can ruin your strands if you try to rush it. Using a numbered clip system helps prevent mix-ups during removal and ensures extensions remain organized for efficient reapplication. Just as with adhesives, check the product expiration date on your remover to ensure it hasn’t lost its potency, since old solutions may fail to break down the bond effectively. Proper aftercare techniques are essential for restoring hair health and preventing future breakage once the extensions are removed.

EASY TO USE - This formula was made for easy and clean removal for K Tip, U-Tip, Keratip, Plastic Tubes, Tape-ins, and Shrinkies Hair Extensions

EASY - This formula was designed to work fast and effectively. It can dissolve the strongest of adhesive bonds.

Quick & Efficient Remover: Our tape in hair extensions remover infused with natural citrus oils and extracts, 0 Harsh Chemicals. Ensuring fast and effortless breaking down of adhesive bonds which are formulated to dissolve adhesive swiftly
How to Remove All Adhesive Residue From Hair
To remove sticky adhesive residue from your hair after tape extensions, start by applying oil-based loosening agents like baby or olive oil directly onto the residue. Let it sit for 5 to 30 minutes to soften the adhesive. Then, gently work through the area with a fine-tooth comb to lift the residue without pulling. If some buildup remains, repeat the oil application and combing process. For optimal removal, focus on dissolving adhesive residue as an initial step by allowing a system cleaner to work in for a minimum of 3 hours before proceeding. Similar to how LED light energy is absorbed by the skin to trigger a biological response, letting the oil penetrate thoroughly ensures the adhesive softens at a deeper level. In the same way, using a wig cap underneath can help create a smoother base and reduce direct contact between tape adhesives and your natural hair. Always gently slide the tape downwards to avoid tugging on the hair shaft.
Next, use dish soap to break down the oily adhesive. Massage a small amount into the affected areas, leave it for one to two hours, then rinse thoroughly with lukewarm water. Follow up with a conditioner to restore moisture and slip to your hair. For stubborn or hardened residue, commercial adhesive removers designed for hair or specialized techniques such as applying low heat or using vinegar can be effective. Always test these methods on a small section first to prevent damage or discoloration. Avoid forceful pulling at any stage to prevent breakage and support healthy hair recovery.

Say goodbye to sticky fingers and hair! Our Tape-in Remover is specially designed to easily remove Tape in Adhesive with little to no residue.

FFAST ACTING WIG REMOVER SPRAY: Our wig remover spray can easily and gently remove your wig. It can be 60 seconds without damage and taking off tape extensions as little as 3 minutes without pain. It can also be used to clean up any adhesive left on your hairline, making it a cleaner and faster way to remove your wig

Tape In Extension Remover for Routine Cleanup - Designed to help soften tape-in hair extension adhesive, wig tape, lace glue, and residue buildup for easier removal and daily maintenance.
Post-Removal Hair and Scalp Care
Once the adhesive is removed, focus on resetting both your scalp and hair with gentle, targeted care. Start with a clarifying shampoo to thoroughly cleanse any residual glue, dirt, or product buildup. Use your fingertips to gently massage the scalp—avoid vigorous scrubbing—to promote blood flow and help remove buildup without irritation. Follow this with a lightweight serum formulated to soothe the scalp, calm inflammation, and reduce flakes. Incorporating proper aftercare for your scalp mirrors the final steps of mastering a tattoo machine setup, where soothing the area prevents complications. Allow your scalp a full recovery period before introducing any active treatments, just as you would with a derma roller schedule that prioritizes healing between sessions.
For your hair, apply a deep conditioning mask from mid-lengths to ends, leaving it on for 10 to 15 minutes before rinsing. Afterward, use a leave-in conditioner or a few drops of argan oil to maintain hydration and tame frizz. If your strands feel weak or brittle, incorporate a protein treatment once a week after your first wash to reinforce hair structure. When detangling, opt for a wide-tooth comb and start from the ends, working upward gently to prevent breakage. Avoid heat styling tools for at least a week to give your hair time to recover and reset.
3 Mistakes That Damage Hair During Tape Removal
Removing tape extensions without a remover is the biggest mistake you can make, as forcing the tape apart when the adhesive hasn’t loosened can snag and tear your natural hair. To prevent damage, match the remover to your hair type—using coconut oil or alcohol can leave residue that weakens the bonds or dries out your scalp. Stick to professional removal products designed to break down adhesive safely without harsh chemicals. Working too quickly is another common error. Always remove one section at a time instead of multiple pieces to avoid yanking and pulling. Never skip fully saturating the tape with remover, and let it soak until the bond slides apart easily to avoid tugging, as the adhesive can coat the hair shaft and trap buildup if not fully loosened. Rushing or under-saturating can cause you to tug too hard, leading to damage. Control your removal process carefully, focusing on patience over speed.
When to Let a Pro Remove Your Tape Extensions
You should see a professional for tape-in extension removal if you experience scalp irritation, matting, or pain. These signs indicate your scalp could be irritated or the extensions are causing discomfort that at-home removal may worsen. Once your extensions are past the 6 to 8-week mark, adhesive breakdown increases the risk of damage or difficulty during removal. A stylist can safely handle residue cleanup or perform same-day retaping—a process that’s tricky to do on your own. Knowing the real damage risks helps you recognize when professional intervention is necessary before issues escalate. Understanding the chemical composition of the adhesive is key to predicting how it will react to different removers. For example, thermal printers used for tattoo stencils rely on precise heat application, which parallels how professional removal tools must apply controlled heat to soften adhesive without harming hair.
If your natural hair is thinning or if you notice breakage, professional removal helps prevent further damage. Cost considerations also play a role; visiting a salon might seem more expensive but can save you from costly repairs later. Trust your stylist when bonds are very tight or if your hair has grown out significantly—these situations require expert hands to prevent harm to your natural hair. For instance, a professional will use a tip applicator bottle to apply remover precisely into the adhesive area, minimizing damage to your natural hair.