If you’re wondering how to keep eyelids stable and lashes organized during lash extensions, tape extensions for lash beds might be a game-changer.
These small, hypoallergenic strips lift and secure the eyelid, making your work more precise and comfortable for your client.
Keep reading to learn how to choose the right tape for different eye shapes and needs.
So, What Is a “Tape Extension” for Lash Beds?
A tape extension for lash beds is a small strip of lash-safe tape used to position, lift, or secure the eyelids and natural lashes during application. It’s usually made from latex-free, hypoallergenic paper or surgical tape. The main consideration is selecting tape with strong enough adhesion to hold down lower lashes or lift an eyelid without slipping during the process. At the same time, it should be gentle enough to remove easily without leaving residue. Typically, you cut small strips from the tape for precise placement near the lash line. This isn’t a specialized product; it’s a practical tool that helps improve access, visibility, and control during lash extensions, resulting in cleaner and more efficient application. For example, purple microfoam tape is an ideal latex-free option for taping and lifting lashes during a fill or set. Just like with a derma roller, needle size changes the recovery time and how often you can safely use the tool. Understanding the micro-needling depth determines how much skin regeneration is stimulated, similar to how tape gauge affects eyelid control. For optimal results, it is crucial to follow the recommended safe frequency for each needle size to avoid skin damage.
Why Tape Extensions for Lash Beds Are Essential for Lower Lash Isolation
Tape is essential for lower lash isolation because it helps you access hard-to-reach, downward-growing lashes by gently adjusting their angles. It also minimizes movement when clients twitch—often caused by caffeine or nerves—keeping your workspace stable. This stability improves both client comfort and your precision. Soft, breathable tapes protect the delicate skin around the eyes while securely holding down lower lashes, allowing you to work faster, more cleanly, and with greater control. Just as in hair extensions, where proper tension and placement prevent damage, correct tape application preserves the delicate eye area and ensures secure adhesion. Beginners should focus on finding the best fit for their tape choice to avoid irritation or slippage during application. The production of medical-grade tape mirrors the precise pigment suspension process used in ink manufacturing to achieve consistent texture and adhesion. For enhanced precision, some lash artists use a floor lamp with magnifying glass to better view the lower lash line during isolation.

GREAT FOR FREQUENT CHANGES: 2 rolls of 1-in x 10-yds Nexcare Gentle Paper Tape (known in hospitals as 3M Micropore Surgical Tape) with a gentle adhesive that can be easily removed for minimal discomfort
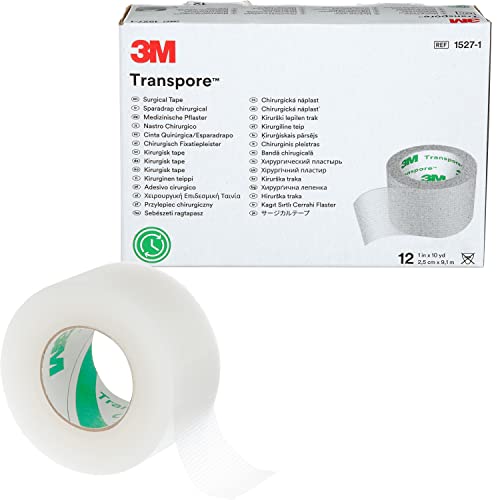
Easy, straight, bidirectional tear

Gentle for Sensitive Skin – Hypoallergenic surgical tape designed for sensitive skin. This medical tape removes cleanly without residue, making it safe for frequent wound care and dressing changes.
How Tape Lifts the Eyelid to Expose More Lash Line
Lifting the eyelid slightly with tape exposes more of the lash line for easier extension placement. The tape gently shifts the skin upward, moving folds out of the way without fully opening the eye. This technique reveals the root of each lash, allowing you to isolate and place extensions with greater precision, especially on hooded eyes or downward-pointing lashes. For optimal results, plan to keep the tape on no longer than 30 minutes to prevent skin irritation. Choosing the right tape direction is crucial: vertical placement lifts the middle of the lid, while diagonal or criss-cross patterns target inner and outer corners. Using Nexcare tape ensures gentle removal without residue or risk of ripping eyebrows. To avoid skin tugging or discomfort, remove the tape slowly, following the direction of hair growth. Ensuring the skin is clean and dry helps the tape hold securely and lift effectively. Similar to how derma rolling relies on microneedling to stimulate collagen production, the precise lift achieved with tape is comparable to how a tattoo machine uses specific needle groupings to access hard-to-reach areas of the skin for detailed work.
How to Apply Tape Extensions Safely, Step by Step
To apply tape extensions safely, start by thoroughly cleansing the lash line to remove oils and residue, then let it dry completely. This ensures the adhesive will grip securely without slipping. Next, cut short strips of tape, about 1 to 2 centimeters in length, to provide precise placement and reduce bulk. To prevent the tape from shifting during application, avoid common mistakes such as failing to secure the wig cap with bobby pins first.
Position the tape close to the lash line, but never let it touch the eyeball or mucous membrane. Keep the tape at a slight angle to prevent catching the natural lashes. Secure the bottom lashes from the outer corner first, ensuring full coverage without pulling on the lashes above. Once placed, check that the eye remains closed comfortably and ask for immediate feedback to prioritize client comfort. This process is gentle, not painful, and ensures safety.
Inspect the tape for wrinkles or loose edges and smooth them out to avoid irritation. When removing, do so gently to avoid pulling the natural lashes, as rough removal can cause lash damage. Always recheck that the tape adheres well before proceeding to ensure it won’t shift during the process or cause irritation.
Best Tape Materials for Sensitive Skin and Eyes
Silicone tape is the best choice for clients with sensitive skin or eyes. Its lower adhesion and repositionability help minimize skin barrier disruption, making removal gentle and reducing discomfort. This directly enhances client comfort and lowers the risk of adverse reactions such as tearing or irritation. Hypoallergenic micropore paper tape is also suitable due to its lightweight, breathable design, which supports airflow and lessens irritation. However, it is less moisture-resistant, so it needs to be changed frequently to maintain hygiene. Avoid acrylic tape in delicate areas because its stronger adhesion can cause skin damage and increase the likelihood of adverse reactions. For fragile eye skin, always select low-residue, latex-free options that prioritize patient comfort over hold strength. Similar to the importance of controlled needle depth when using derma rollers for beard growth, choosing the correct tape adhesion level is vital for preventing tissue trauma. Given that infant and elderly skin is particularly prone to trauma, choose adhesives with a proven gentle profile to prevent skin stripping or irritation during removal. Just as needle configuration groupings are crucial for achieving precise results in tattooing, selecting the correct tape material is essential for avoiding skin damage in lash application. As with LED masks, the effectiveness of any treatment depends on consistent, proper use tailored to the individual’s needs.

PAIN-FREE: 1 roll of 1 in x 4 yds Nexcare Strong Hold Pain-Free Removal Tape (known in hospitals as 3M Micropore S Surgical Tape) with painless removal for minimal discomfort

Breathable and comfortable: Microporous design with good breathability and high ductility, waterproof and sweatproof, won't get in the way of the skin

Quantity: 6 rolls lash tape, 0.47 Inch x 10 Yard each roll, enough to meet your needs.
What Makes a Lash Tape Sticky Enough Without Tearing Skin
A lash tape that’s sticky enough without tearing skin strikes the right balance between hold and gentle removal. The key is achieving medium tack, which provides secure adhesion without risking damage during removal. Applying firm, even pressure on clean, oil-free skin enhances stickiness without requiring excessive adhesive. This prevents lifting caused by moisture or movement, ensuring your lashes stay in place throughout wear. Consistent, targeted wavelengths of light in skincare similarly rely on precise dosages to avoid adverse reactions while maximizing efficacy. A reliable alternative is to wear a wig cap underneath, as its smooth surface helps anchor tape more evenly without shifting.
Tapes with too much stickiness can strip or irritate the epidermis when removed, leading to discomfort and skin damage. Conversely, weak tapes won’t hold lashes securely, causing them to lift or fall off prematurely. Choosing medical-grade or silicone-based tapes offers reliable bonding that’s gentle on skin, making removal smooth and less likely to cause tearing. To avoid tugging, soften the tape with an emollient before removal and always peel gently along the natural skin lines. This approach mirrors how red light masks improve skin by using targeted wavelengths to deliver measurable benefits without causing irritation.
Proper preparation, even pressure during application, and the right tape quality all contribute to secure placement with a gentle, non-traumatic removal process.

SILICONE TAPE MEDICAL FOR SENSITIVE SKIN: Made with premium hypoallergenic silicone, this medical tape sensitive skin solution is designed to reduce irritation while providing secure adhesion; ideal skin tape for everyday use, wound care, and delicate areas

SILICONE TAPE MEDICAL FOR SENSITIVE SKIN: Made with premium hypoallergenic silicone, this medical tape sensitive skin solution is designed to reduce irritation while providing secure adhesion; ideal skin tape for everyday use, wound care, and delicate areas

Gentle and Comfortable - Niceful medical tape is made of soft material, which is more gentle and comfortable compared to traditional tape, causing no skin irritation or discomfort. This hypoallergenic surgical tape is perfect for sensitive skin.
Match the Tape to the Client’s Eye Shape and Sensitivity
Matching the tape to the client’s eye shape and sensitivity involves selecting the right type and application technique. For almond-shaped eyes, medical foam tape provides a secure hold without excessive pressure. Round eyes benefit from hypoallergenic tape, as the under-eye area is more delicate and prone to irritation. Hooded eyes require eyelid tape to lift the lid and reveal the natural lash line better. Monolid eyes need pre-cut tape to create a flatter surface, offering a more even base. For deep-set eyes, choose breathable medical tape to avoid adding extra pressure or discomfort. When selecting tape for clients with droopy eyelids, using a stronger adhesive like surgical tape ensures the lid stays lifted without shifting during application, which preserves the fan shape during placement. Understanding the differences in tattoo machine types can help technicians relate grip and stability techniques to lash tape adhesion. However, just as with tape-in hair extensions, the tape’s adhesive quality and material composition are crucial for ensuring a secure yet gentle hold on the client’s skin. Proper skin preparation before application, such as cleansing and drying the area, enhances adhesion and reduces the risk of lifting or irritation.
For clients with sensitive skin, prioritize hypoallergenic or medical-grade tapes to prevent irritation. Color-matching the tape to your client’s skin or eye color helps track placement accurately and minimizes visible lines. When removing tape, opt for gentle options like Nexcare, which lift easily without leaving residue or pulling fragile skin. Custom trimming the tape allows it to contour perfectly to the client’s eye shape, and positioning it away from the waterline prevents discomfort and ensures proper lash placement. Always perform a comfort check before proceeding to confirm the client’s ease and safety.

Upgrade Medical Materials: This waterproof and breathable medical tape for eyelash extensions is easy to remove and leaves no adhesive residue upon removal, tape gentle enough not to damage the stratum corneum, it will not hurt your skin when removeing.

SILICONE TAPE MEDICAL FOR SENSITIVE SKIN: Made with premium hypoallergenic silicone, this medical tape sensitive skin solution is designed to reduce irritation while providing secure adhesion; ideal skin tape for everyday use, wound care, and delicate areas
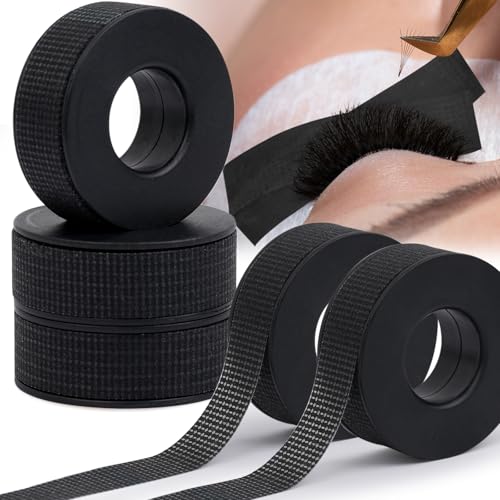
Breathable and Soft: Micro porous silicone gel tape has high breathability and soft touch, fitting the skin perfectly, waterproof and securely.