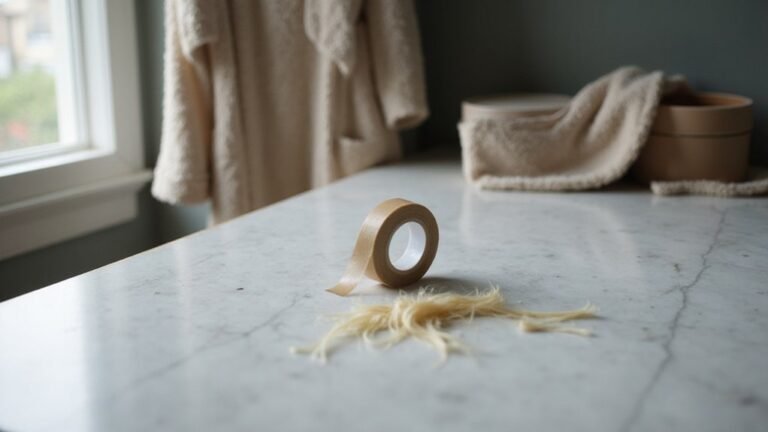
Thinking about getting tape-in hair extensions but confused on how they actually stay in place? These extensions work by sandwiching small sections of your natural hair between two adhesive strips, creating a secure and flat bond that lies smoothly against your scalp.
With proper care, they can stay put for months while allowing you to style and wash normally. Keep reading to learn the full ins and outs of this popular method.
What Are Tape-In Hair Extensions?
Tape-in hair extensions are semi-permanent wefts attached with thin, medical-grade adhesive strips placed close to your roots. Each weft is approximately 4 centimeters wide and designed to sit flat against your scalp for a natural appearance. These extensions are especially suitable for fine or thin hair because they are minimally invasive and comfortable to wear. You can choose between human or synthetic hair, available in a variety of colors to perfectly match or contrast your current hair shade. The adhesive bond lasts several weeks, and with proper maintenance, you can reuse the same tape-in pieces up to three times by replacing the tape. To ensure the best adhesion, make sure your hair is clean and free of styling products before application. As with any product applied to the skin or scalp, it is important to confirm that the adhesive uses medical-grade safety standards to avoid irritation or allergic reactions. Understanding the proper application technique helps ensure the tape sits flush without damaging the natural hair shaft. For additional protection, regularly inspect your scalp for signs of irritation to maintain safe wear guidelines similar to those for permanent ink procedures.
How the Tape-In Sandwich Method Works
The tape-in sandwich method involves placing a thin slice of your natural hair, approximately 0.5 to 1 centimeter wide, between two adhesive wefts. This creates a flat, secure bond that stays close to your roots without touching your scalp. Since the wefts are flush against your head, this placement reduces pulling and increases comfort during wear. This installation process is made more efficient when using consistent 1-inch spacing between rows to ensure a seamless blend. Unlike claims made for some cosmetic tools, the bond strength of tape-in extensions depends on proper application technique rather than skin penetration. To achieve lasting results, it is crucial to use a high-quality adhesive that is specifically designed for hair extensions.
To apply, you align the adhesive surfaces of the wefts, then press firmly to ensure a strong bond. Some installers use flat pliers or their fingers to enhance the seal. If the tackiness is weak, briefly heating the bond with a heating plate can help. It is essential to start with clean, dry hair free of heavy products for optimal adhesion.
The resulting attachment supports versatile styling options like curling, straightening, or updos without visible bumps. It also allows for color matching or highlighting, as the flush placement reveals no bulk or gaps. When properly cared for, the bonds can last for several months before needing reinstallation.
Why Tape-In Extensions Lie Flat Against Your Scalp
Tape-in extensions lie flat against your scalp because their low-profile bond design uses thin, medical-grade adhesive tabs instead of bulky attachments. This allows for better scalp ventilation, preventing heat and moisture from getting trapped against your skin. The flat bonds reduce tension and integrate well with your natural hair texture because the gentle adhesive distributes weight evenly along each strand. For a secure fit, leave a 1/4 to 1/2 inch gap from the root; too close, and you risk discomfort and lifting. Keep sections thin and even—thick sections can create a bulky ridge, while thin ones might slip easily. Make sure your hair is clean and dry before application to keep the bonds flush and breathable. Proper alignment helps your extensions stay hidden and move naturally with your head, ensuring comfort and a seamless look. This method mimics the gentle, minimally invasive approach of microneedling to avoid damaging the hair follicle. Similarly, the adhesive tabs are manufactured using precise, chemical-free methods that ensure consistent bond strength and prevent skin irritation. To maximize the lifespan of your tape extensions, realistic wear times typically range from six to eight weeks before a maintenance move-up is needed.
How to Install Tape-In Extensions
To install tape-in extensions, start by washing your hair with a clarifying shampoo to remove oils and buildup. Skip conditioning at the roots to ensure the tape bonds properly. Blow-dry and flat-iron your hair until it is smooth, creating a sturdy base for the extensions. Section off your top half, leaving enough natural hair underneath to conceal the tape-in bonds. Create a clean, horizontal part for each row of extensions to keep the placement neat and secure.
Peel the backing from one weft and place it underneath a thin, horizontal section of your natural hair. Align a matching weft above it, pressing firmly to form a sandwich that holds the extension in place. Use a small amount of hair for each sandwich to ensure a secure bond without added bulk. The best caps for making wigs are reviewed for similar considerations of fit and durability. Proper tape adhesion is critical for longevity, but your refit timing schedule will also determine how long they stay secure. Different types of hair extensions require specific techniques, but tape-in extensions generally follow this sandwich method. While adhesive alternatives are available, tape-in bonds provide a flat, discreet, and comfortable fit. Position each bond at an angle that matches the shape of your head, leaving space between sandwiches to prevent bulkiness. Allow at least 24 hours before shampooing to give the adhesive time to fully set. Be aware that some tattoo inks share similar chemical pigments with hair dyes, so check ingredient safety if you have sensitivities.
How Far From the Root Should Tape-Ins Be Placed?
Place your tape-in extensions about 1 inch below your natural scalp line. This distance helps prevent tension on your roots and allows your hair to move naturally. Position the tapes just below your parting, ensuring they are not flush against it, to keep them concealed under your top layer. When working with multi-directional growth at the crown, it is best to avoid this area to maintain a seamless blend. Avoid placing the tapes too close to your hairline—leave at least two fingers of space near your temples and ears. This prevents stress at the edges and keeps the tapes invisible in your hairstyle. When working on crown sections, maintain a consistent gap of roughly 1 inch from your parting to make styling easier and hide the tapes from different angles. The goal is to allow slight movement at the roots for comfort and to keep the extensions well hidden from multiple viewpoints. Consistently using a derma roller for hair growth can help stimulate the scalp and thicken natural hair, which supports a healthier foundation for tape-in placements.
How to Make Tape-Ins Look Natural
To make tape-in extensions look completely undetectable, focus on color blending and hair texture. First, select extensions that match your hair’s natural texture—whether straight or curly—to prevent any obvious contrast. When it comes to color, blend the extensions to your mid-lengths and ends, rather than your roots, since roots tend to be darker or lighter than the rest of your hair. Using multi-tonal shades creates natural dimension, mimicking the subtle variations found in real hair. When selecting extensions, using Vietnamese Southeast Asian hair that is thicker and more coarse can enhance blending with similar natural textures. To ensure a secure and lasting installation, it is crucial to clean and dry the natural hair thoroughly before applying the tapes, as oils or residue can weaken the adhesive.
Next, consider density carefully. Install only enough tape-in panels to match your natural hair thickness; overloading with volume can make the extensions stand out. After the installation, cut and layer the extensions to blend seamlessly with your haircut, softening any blunt lines that give away the added length. Proper maintenance is also important, as white ink tattoos require attention to prevent fading over time. Additionally, always use sulfate-free shampoos and conditioners to preserve the adhesive bond of the tapes, which is a critical part of proper aftercare for lasting results.
Finally, style both your natural hair and the extensions in the same direction. Use a round brush and downward airflow when blow-drying to promote cohesion. Leave enough top hair to fully conceal the tapes, ensuring the transition remains invisible. Proper blending and styling make your tape-ins look natural and undetectable.
How Long Do Tape-In Extensions Last?
High-quality Remy tape-in extensions can last between 6 to 12 months with proper care. The longevity depends on how well you maintain them and how often you reinstall the extensions. You can typically reapply them 2 to 4 times before needing to buy new strands, which makes them a more economical choice. Proper maintenance includes gentle washing, regular detangling, and avoiding excessive heat or chemical treatments. Keeping an eye on the adhesive’s condition is essential; once it weakens or the tape starts to peel, it’s time to replace or reapply. Similar to how needle grouping sizes determine the specific effects of a tattoo machine, the tape-grip strength of your extensions determines their hold duration. When removing them, use a specialized adhesive remover to avoid damaging your natural hair. For optimal results, follow diamond microdermabrasion tips to keep your scalp and hair follicles healthy.
Why Oil Weakens Tape-In Extension Adhesion
Oil contamination is the primary factor that weakens tape-in extension adhesion. Since the adhesive relies on direct contact with a clean, dry surface, any oil from your scalp, conditioner, or styling products creates a barrier that prevents proper bonding. Scalp sebum naturally seeps into the tape zone, while heavy oils from conditioners or serums coat the hair, leading to adhesive breakdown. Silicone-rich products mimic oil by forming a slick layer on your hair, which further impairs the seal. No matter how accurately you place the tape, if oil is present, the adhesive won’t hold securely. Heat, moisture, and touching the tape with oily hands can also contribute to slippage. To maintain a strong bond, you must thoroughly cleanse your hair and avoid applying oily products near the tape area. Proper preparation of the skin and hair, much like cleaning a derma roller before use on a clean surface, ensures the adhesive can bond effectively. For safe removal, gentle oil application is key to dissolving the adhesive without pulling or damaging the hair.
What Happens During Tape-In Removal?
Removing tape-in extensions involves a careful, step-by-step process to prevent damage to your natural hair. First, you section off the hair at the nape of your neck and use a rat-tail comb to expose each tape sandwich. Clipping the surrounding hair out of the way ensures you work precisely on each bond.
Next, apply a remover solution to both sides of the tape bond. This chemical softens the adhesive, typically within 30 seconds to 15 minutes. It’s important not to rush this process—if the bond resists, add more remover instead of forcing it, to avoid ripping or breaking your hair. After six weeks, adhesive residue can coat the hair shaft, trapping product buildup and dirt, which complicates removal.
Once the bond loosens, gently peel the wefts apart. You should encounter minimal resistance as the tape slides away. After removing the weft, focus on cleaning any leftover adhesive residue. Apply extra remover to the sticky parts, then carefully comb it out with a fine-tooth comb. Using an oil or serum can help loosen stubborn bits. Finally, wash your hair with clarifying shampoo and follow up with a deep conditioner to restore moisture and health.
Can You Reuse Tape-In Hair Extensions?
Yes, tape-in hair extensions can be reused, but only the hair wefts, not the original tape tabs, which are designed for single use. With proper maintenance, you can typically get 2 to 3 reuse cycles, and high-quality Remy human hair may last for four or more uses, depending on how well you care for them.
How you maintain your extensions significantly affects their reusability. Make sure to remove all old adhesive residue completely before reapplying new tape. You can choose from various adhesive options, including standard and ultra-hold tapes, based on your hair type and lifestyle. Keep in mind that heat styling near the tape area can shorten the lifespan of the wefts.
For optimal results, it is best to have a professional remove, clean, and retape your extensions. Store them in a clean, dry place between uses. If the hair begins to tangle excessively or shed more than usual, it’s a sign it’s time to replace the wefts instead of reapplying.