Have you ever wondered how tattoo artists choose the right needles for different styles? The numbers on a tattoo needle might seem confusing at first, but they actually reveal key details about how the needle will perform.
From thickness to ink flow and shading, understanding these numbers will help you match needles to your desired effect. Keep reading to unlock the secrets behind tattoo needle selection.
What Do Those Numbers on a Tattoo Needle Actually Mean?
A tattoo needle code like 1207RL provides detailed information about the needle’s build. The first part, 12, indicates the gauge—specifically, a #12 gauge with a diameter of 0.35 mm. This number helps you quickly identify the needle’s thickness, which influences how much ink it deposits and how it feels during use. You’ll often find this number paired with a needle color code that matches the gauge for easy recognition. The 07 signifies that seven needles are grouped together, which determines the coverage area per pass—more needles mean wider lines or faster shading. Finally, RL designates the needle configuration as a Round Liner, ideal for creating crisp, precise lines. Thicker needles (lower gauge) create larger holes, pack pigment faster for bold work. Reputable brands include this code after sterilization confirmation, so you can confidently select sterile, properly assembled needles for each session. Understanding the needle gauge is also crucial because the ink’s viscosity directly affects how smoothly it flows through the needle and into the skin. For broader coverage, configurations like magnum groupings are commonly chosen to shade large areas efficiently. Proper cleaning with green soap helps maintain the needle’s performance and prevent residue buildup.

50 pcs Mix Assorted Tattoo Needle Cartridges - Includes are a mix of #12 Standard RL needles.
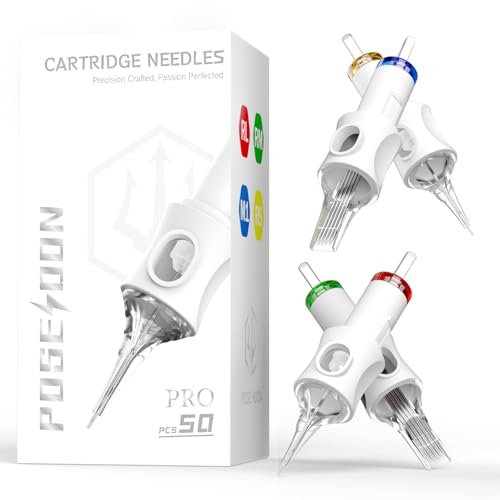
【Complete Variety Pack】50 sterile tattoo needles (5 sizes × 10 each) including 1203RL,1205RL,1207RL,1209RL,1211RL. The spiral nozzle design holds 30% more ink than standard needles, while laser-sharpened tips ensure crisp lines and smooth shading - perfect for both studio professionals and home practice.

Hawink New Tattoo Cartridge Needle,Exquisite in every step of production,Make your tattoo work exceptionally smooth and joyful.
Why Needle Gauge Matters More Than You Think
Needle gauge matters more than you might think because it directly impacts ink flow, skin trauma, and line weight. A larger gauge number means a thinner needle, which deposits less ink per pass. This requires more layering but is gentler on the skin, reducing trauma and healing time. Conversely, a smaller gauge, or thicker needle, pushes more ink with each pass, speeding up saturation but creating larger holes that can cause more skin damage. Thicker gauges also tend to be more durable, holding up better under pressure during long sessions, while finer needles are more flexible but may bend or break easier. Your choice influences not only the quality of your work but also your comfort, control, and overall healing results. For example, an 8 gauge needle measures 0.25 mm at its thickest point, making it ideal for detailed, delicate work. Much like LED face masks aim to reduce skin trauma by promoting healing, selecting the right needle gauge minimizes unnecessary damage to the skin. This process of controlled injury and repair closely mirrors the micro-injury mechanism used by derma rollers to stimulate collagen production. When healing is compromised, the risk of complications rises, so understanding your aftercare routine is just as essential as your tool choice, and avoiding overworking the area can prevent hair loss in the long run for those with sensitive scalps.
How Needle Count Changes Your Line Thickness and Shading
Needle count directly influences your line thickness and shading. For lines, using a needle grouping of 3RL to 5RL creates fine, precise marks suitable for detailed work. Moving to 7RL to 9RL produces bolder lines for general outlines, while 11RL to 14RL are ideal for traditional, solid borders. Larger groupings cover more skin in a single pass, making straight, clean strokes easier to maintain. After completing your tattoo, follow safe removal steps for bandages to avoid damaging the freshly pigmented area. Understanding how derma rollers promote collagen can also inform your aftercare routine for healthier skin healing.
In shading, higher needle counts allow for faster coverage and better ink saturation, especially over larger areas. Just as selecting the right wig cap depends on finding the right fit for your head, choosing the right needle grouping ensures the best results for your tattoo design. Opt for the highest needle count your design permits to fill sections efficiently. Keep in mind that needle spacing also plays a role; tighter configurations produce finer lines even with the same count. Combining the right needle count with proper spacing ensures controlled thickness and helps avoid extra passes that can lead to skin trauma. Taper length influences ink placement precision and affects how the needle group behaves in the skin.
Round Liners vs. Round Shaders: When to Use Each
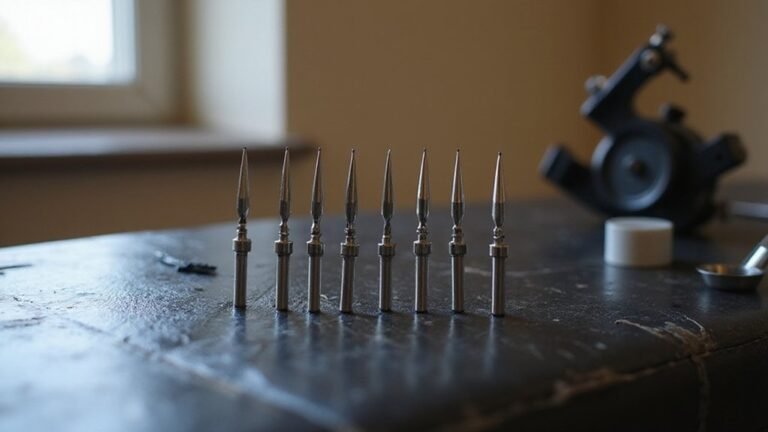
Round liners (RL) and round shaders (RS) are distinguished primarily by their needle groupings. RL have tightly packed needles, making them ideal for crisp, precise linework. They allow you to create sharp outlines, fine scripts, and intricate details with controlled, pinpoint accuracy. Their concentrated needle arrangement delivers pigment into a small point, giving you ultimate control over each stroke.
In contrast, RS have needles spaced slightly farther apart. This looser grouping disperses ink more gradually, making them better suited for softer, bolder, or textured shading and coloring. While you can use RS for lining, expect a less rigid, bolder edge compared to RL. These shaders excel in small-area shading, basic fills, and blending color tonalities smoothly. This spacing makes shaders more forgiving of wobbling or shakiness during application.
Many artists choose to use both in a single tattoo session—RL for outlines and crisp details, RS for internal shading and tonal gradations. Match RL to work that demands precision, and switch to RS when broader coverage or softer finishes are needed.

Package: 50pcs mixed tattoo cartridge needles, includes 10pcs each of 1203RL, 1205RL, 1207RL, 1209RL, 1211RL.
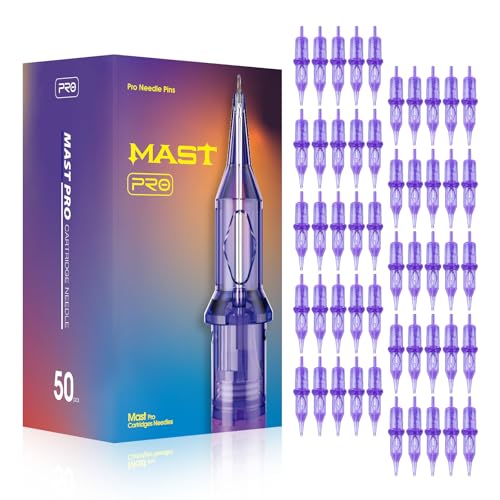
Mast Pro purple tattoo cartridges needles have been providing with high density clear plastic body.

Poseidon cartridge adopt a one-time joint design hygienic standard The material is stainless steel and easy to color,and has better ink flow
Flat Shaders and Magnums: The Best Tools for Packing Ink
Flat shaders are ideal for straight, dense lines and precise geometric work thanks to their blade-like edge. Magnums, on the other hand, dominate large ink packing tasks because of their two-row design that covers broader areas faster and with less trauma to the skin. For solid saturation, a flat magnum is the best choice; its straight pins push pigment directly into the skin, producing crisp, even fills perfect for color blending. Curved magnums excel in creating smooth gradients and softening edges, making them suitable for textured shading. When considering long-term results, tape extensions can cause similar risks of traction damage if not applied correctly, emphasizing the importance of technique in any body modification. An artist must also match the needle configuration to the specific design to achieve optimal saturation and healing.
When you need control for straight-line shading or detailed patterns like mandalas, flat shaders deliver dense ink with fewer passes, reducing overall trauma. Magnums reduce trauma by efficiently covering broad zones, enabling quicker work with less skin damage. Flat shaders require careful handling to prevent excessive skin trauma due to their sharp edges. For large, fast fills, choose magnums; for precise, sharp bands of color, opt for flat shaders. Less trauma is a key advantage of magnums for large-scale work.

Mast Pro purple tattoo cartridges needles have been providing with high density clear plastic body

Complete Packaging: 50pcs mixed size tattoo cartridge needles set, includes 5pcs each of 1205RL 1207RL 1209RL 1205RS 1207RS 1209RS 1207RM 1207M1 1215M1 1215RM. The unique design of the needle can store more ink, and the sharp needle thread better completes tattoo activities, suitable for both professional tattoo artists and beginners.

SAFETY MEMBRANE - Safety membrane inside cartridges system, that stops ink from passing through to the tube or tattoo machine. The cartridge needles are compatible with cartridge grips and machines. Cartridges come with close mouthed tips which can make needles strike more steady.
Needle Taper Explained: Why Ink Flow Depends on Tip Geometry
A shorter taper deposits more ink quickly, creating bold saturation, while a longer taper delivers smoother gradients with less tissue trauma. A taper length of about 1.5 mm produces a steep, blunt tip that forces ink into the skin rapidly, ideal for filling in solid colors or making bold lines. Conversely, a longer taper of 5 to 7 mm results in a more gradual, narrow tip that allows ink to flow slowly, giving you better control and softer shading. Proper machine holding technique stabilizes the hand to prevent inconsistent needle depth, which directly affects how the taper performs in the skin. This variability in geometry is similar to how derma roller needles create controlled micro-channels to enhance absorption without excessive damage.
The shape of the taper affects ink flow dynamics directly. A shorter, steeper taper increases the amount of ink deposited per strike but raises the risk of tissue compression and skin trauma. Longer tapers, with their slower ink flow, reduce tissue trauma and provide finer control, making them suitable for detailed work and subtle gradients. Your choice balances speed, control, and client comfort, depending on the effect you aim to achieve. This precision mirrors how targeted light therapy relies on specific wavelengths to minimize collateral damage while maximizing treatment efficacy.
Choosing the Right Needle for Fine Lines and Crisp Details
For fine lines and crisp details, a 1RL to 5RL round liner needle configuration is ideal. These needles are designed for precision, with a single needle (1RL) producing the finest lines and up to five needles (5RL) offering slightly wider, yet still very sharp, strokes. A 3RL bugpin is particularly effective for micro-realism, thanks to its thinner #10 gauge wire that creates ultra-fine strokes suitable for intricate work. Selecting the right configuration is guided by understanding needle grouping and how it affects line weight and precision. Sterilization is crucial when using these delicate needles—sterile needles prevent contamination during the detailed passes. Finer needle diameters, such as a #6 gauge, reduce trauma to the skin, helping maintain sharper edges and cleaner lines. Just as careful removal techniques prevent damage when taking out tape-in extensions, proper sterilization minimizes the risk of infection in tattoo work. When choosing between tools, careful damage risk is lower with fine needles than with abrasive skin rollers. For coloring fine details, a bugpin 5RL distributes ink about 30% thinner than a standard 5RL, enabling more vibrant and precise lines without excess bulk. Always match your needle count and configuration to the complexity of your design to achieve the sharpest, most accurate results.

[Package]: 50pcs Assorted tattoo cartridge needles, includes 10pcs each of 1203RL, 1205RL, 1207RL, 1209RL, 1211RL.
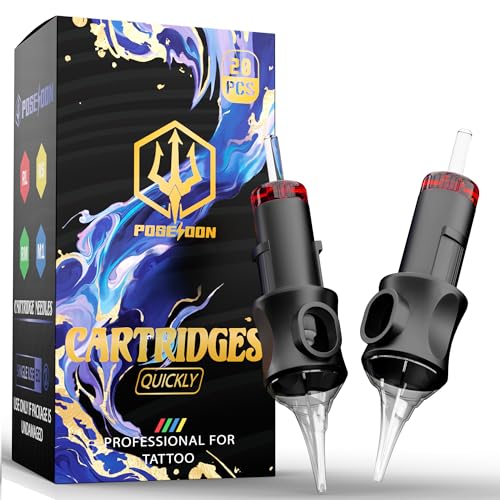
Complete Packaging: 20pcs tattoo cartridge needles set,The unique design of the needle can store more ink, and the sharp needle thread better completes tattoo activities, suitable for both professional tattoo artists and beginners.

PACKGE LIST:50pcs mixed size tattoo cartridge needles set,10*1203RL, 10*1205RL ,10*1207RL ,10*1209RL ,10*1211RL,Tattoo cartridge needles are each needle cartridge is individually packed and sealed.
Picking the Right Needle for Bold Outlines and Heavy Shading
For bold outlines and heavy shading, select larger needle configurations such as 9RL to 14RL. Use a #12 gauge (0.35mm) needle for optimal ink flow and crisp, solid lines. Short to medium tapers are ideal because they support efficient saturation, allowing you to pack black in fewer passes. This setup helps create dense, consistent shading and bold edges while minimizing trauma to the skin. When working on larger areas, stacked magnums or round shaders spread the ink evenly, ensuring smooth color blending. Keep the skin taut with firm tension to maintain consistency in your bold lines. Matching your needle size to the design’s scale is crucial—larger needles for broader outlines and shading, smaller for finer details—so you can achieve traditional, Japanese, or tribal styles without sacrificing precision. Just as with tape extensions, removing tape at home requires careful technique and the right tools to avoid damage to the hair or skin. Understanding the pigment suspension in tattoo ink helps ensure the chosen needle configuration delivers consistent color saturation and longevity.

50PCS ROUND LINER SET: Assorted #12 (0.35mm) round liner cartridges in 3RL, 5RL, 7RL, 9RL and 11RL — from clean everyday lines to bold traditional outlines.

【High-Quality Premium Materials】 Crafted with 316L stainless steel bugpin needles for exceptional sharpness and durability. High-grade plastic shell with resilient silicone provides smooth operation during extended sessions. Each disposable cartridge ensures hygienic, quality results for tattoo artists.

50 pcs Mix Assorted Transparent Tattoo Needle Cartridges - Includes are a mix of #12 Standard RL needles.
Common Mistakes Beginners Make When Selecting Needles
Selecting the wrong needle size can turn a precise design into a patchy mess and increase skin trauma. Beginners often choose smaller needle sizes, like 3 or 5 round liners, thinking they offer better control. However, these tiny needles require more passes, which can cause excessive skin damage and uneven color blending. Instead, start with midsize liners, such as 9 or 11 round liners. These are forgiving, easier to control, and produce cleaner, more consistent results. Larger needles or shader needles are better suited for achieving bold, heavy lines that maintain clarity.
Avoid the mistake of using one needle type across all techniques. Needles like liners, shaders, and magnums serve distinct purposes and aren’t interchangeable. Using the wrong one can compromise the quality and accuracy of your work. Additionally, don’t overlook needle quality. Low-cost cartridges may bend or wobble, ruining your precision. Always opt for polished, high-quality needles to minimize trauma and improve control.
Matching your needle choice to your voltage and hand speed is crucial. A setup that doesn’t align can amplify errors, making your work less precise. Before each session, inspect your needles carefully to ensure they are intact and suitable for your project. For beginners, sticking with midsize liners, such as 9 or 11 round liners, is a safe choice—they’re forgiving and effective while you develop your technique.