Putting together a tattoo machine can seem daunting at first, but with the right steps, you can assemble it correctly and achieve smooth operation.
The key is understanding how each part fits together—starting with the frame, coils, springs, and armature bar, then moving on to the tube, needle, and electrical connections.
Once you get the hang of proper assembly, fine-tuning will make your machine perform even better.
The instructions below walk you through every step to help you build your machine with confidence.
Identify Tattoo Machine Frame, Coils, Springs, and Screws
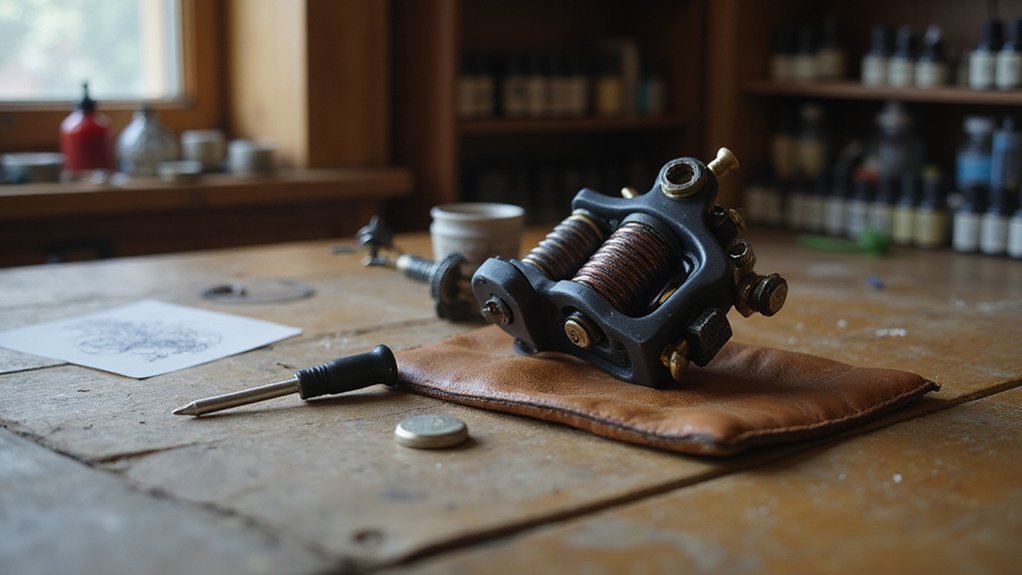
The frame, coils, springs, and screws are the essential components you need to identify before assembling a tattoo machine. The frame is the foundation and can be made from materials such as copper, stainless steel, or aluminum, each offering different levels of durability and stability. Coils are mounted onto the frame to generate the electromagnetic motion that moves the needle. Proper wiring of the coils is crucial to ensure the machine functions correctly and reliably. The number and configuration of coils can vary between different types of tattoo machine designs, such as single-coil or multi-coil setups, affecting performance. Springs, including the front and back springs, control the speed and strike force of the needle; their tension depends on the placement of adjustment screws. The contact screw is responsible for determining the stroke length by adjusting how far the armature bar strikes the contact point. The rear binding post completes the circuit by connecting the coil to the power supply. All screw connections must be checked and secured tightly, as they hold the spring assembly and coil alignment in place. Proper identification of these components guarantees consistent performance and smooth operation during tattooing. Similar to how a derma roller uses micro-needling penetration to stimulate collagen production, precise needle depth is critical for both devices to achieve their intended effect. The manufacturing process for tattoo ink involves mixing pigments with carriers and sterilizing the solution to ensure safety and consistency.
Gather Grip, Tube, Needle, Clip Cord, and Power Supply
To set up your machine, gather the grip, tube, needle, clip cord, and power supply. First, select a grip and tube that match your machine model. Tighten the grip around the tube securely, as any looseness can reduce control during use. Beginners should also verify that the tube’s internal diameter matches the needle size to ensure smooth passage without friction. Understanding the composition of tattoo ink pigments ensures you select a safe product for your session.
Handle the needle carefully to prevent bends; a slight bend in the needle bar can help it stay on the armature bar. Thread the needle through the tube, leaving just enough of the needle visible for adjustment. Slide the tube up or down to set the correct needle depth—about 1/16 inch (roughly the thickness of a credit card). Once positioned, secure the tube clamp firmly to prevent movement.
Next, attach the clip cord to the rear binding post, ensuring it fits snugly for consistent power delivery. Finally, connect the power supply, but do not turn it on yet. Your choices for ink color and skin preparation come later, after the machine is properly assembled. Proper aftercare later requires removing your tattoo bandage at the correct time to prevent infection.
Check the needle’s alignment to avoid bending during operation.
Set Up Frame and Align Armature Bar Over Coils
To set up the frame and align the armature bar over the coils, start by tightening the frame securely to prevent movement during operation. Center the armature bar between the coils so it sits level against the front coil. Properly positioning the armature ensures the bar strikes cleanly without binding or misfiring. Maintain a small, intentional gap between the bar and the rear coil to avoid excessive contact, which can cause sticking or uneven performance. Ensure the armature bar gap is consistent for reliable function.
Adjust the coil tension by checking that the front spring aligns evenly with the contact screw when the machine is at rest. Make sure the bar’s nipple lines up with your needle tube for straight, smooth needle travel. If the armature bar is angled or off-center, tweak its height or angle until it is perfectly aligned. This entire kit is designed for user-friendly lining and shading.
Secure the coils firmly but do not overtighten, as excess tension can distort the coils or affect the armature’s movement. Once aligned, double-check all frame screws to ensure everything is tight and stable. A level and centered setup prevents uneven vibration and drifting during operation, resulting in consistent needle movement every time you use your machine. Beginners should prioritize a secure and precise fit, much like choosing the right wig cap for beginners to avoid slippage during use. Neglecting regular maintenance will shorten the tape in extensions lifespan, just as poor setup can ruin machine performance.
Place Front Spring Over Back Spring Around Screw
Place the front spring over the back spring around the screw. Start by sliding the front spring underneath the washer so that its pronged end cradles the screw. Next, wedge the back spring from the opposite side, resting its prongs over the arms of the front spring. This arrangement ensures both springs stay centered on the fastener, promoting correct screw alignment. Improper angle of the rear deck can increase tension on the rear spring, leading to misalignment. Ensuring the cap material remains smooth and free of wrinkles prevents similar structural issues in wig cap construction. Using the correct needle grouping ensures the spring setup matches the intended machine performance. Achieving this precision is critical for reliable tattoo machine operation in any professional setup.
Adjust the springs until they are straight on both sides of the screw, making sure not to trap the front spring’s crease under the washer. The stacked springs should fit snugly around the screw, minimizing wobbling. Tighten the screw gently at first; full tightening will come after you check the alignment. If the springs shift out of position, reposition them immediately to maintain proper alignment.
Proper placement of the springs and screw prevents vibrations and ensures smooth operation later. The completed stack should form a straight path through the frame, with the bottom of the screw sitting flush with the armature bar.
Secure Coils and Adjust Contact Screw Gap
To secure the coils properly, ensure they are fully seated in the frame before tightening. This prevents shifting during operation and maintains correct alignment. Match the coil connectors with the appropriate frame holes, using washers to create a snug fit. Tighten the connectors loosely by hand first, then secure them firmly once alignment is confirmed. Check that the coil winding sits cleanly and evenly; misalignment can stress the wiring path and cause premature wear. Bind the front and back binding posts so the coil connector loops sit correctly between washers, reducing pressure on the wires. This approach also enhances insulation and protects the coil assembly from damage over time. Proper coil securing creates a low-risk environment for stable operation, similar to how correct wrapping ensures internal component safety. Following pro-level tips from experienced artists further reduces electrical anomalies during use.
Next, adjust the contact screw gap precisely. For a liner, set the gap to approximately the width of a dime; for a shader, use about the width of a nickel. Loosen the thumb screw to move the contact screw closer to the front spring, which increases the cycle rate, or move it away to slow down. Press down the armature bar to check the gap — it should be consistent and enable smooth operation. Once in position, tighten the thumb screw securely to prevent any drift during use, ensuring stable performance.
Insert Needle Through Tube and Attach to Armature Bar
To insert the needle through the tube and attach it to the armature bar, start by guiding the needle through the front of the tube, ensuring the grouping sits beneath the bar for proper alignment. A slight bend in the needle bar can enhance tracking and stability, but avoid over-bending, as this increases friction and can cause issues. If you encounter resistance, pull back gently and reinsert the needle slowly to prevent tipping or barbing the tip. The needle’s angle should keep the grouping aligned along the bottom inside of the tube to maintain consistent needle movement. Once the needle passes through, secure the loop firmly on the armature bar peg. Verify that the loop is fully stationary before tightening, as a loose loop can cause poor needle control and inconsistent motion. Always check bar stability prior to tightening to ensure smooth operation. This bend causes the needle to bow upwards in the machine, contributing to the arc and tension mechanism that ensures stable performance. A common mistake is setting the needle too deep, but maintaining consistent needle depth prevents skin damage and promotes effective ink deposition. Proper needle depth must also be configured to prevent skin damage and promote effective ink deposition. To choose equipment that avoids such issues, always select high-quality needle brands that offer reliable consistency in needle sharpness and alignment.
Slide Tube Into Grip and Align Needle With Tip
Guiding the tube into the grip and aligning the needle with the tip involves several precise steps. First, insert the tube into the grip from the rear, then slide it forward until it fits snugly but remains adjustable. This adjustment phase lets you fine-tune the position before tightening the screws. Keep the tip oriented so the needle path is centered through the tube and opening. Proper needle centering means the needle runs straight without rubbing against the walls of the tube or tip, which is crucial for accurate and smooth operation. Just as with a derma roller, the needle size determines the appropriate depth and tissue response for safe use, and using homemade mixtures may increase the risk of adverse skin reactions. For tackling accidental ink spills during setup, blot fresh stains immediately with a clean cloth to prevent them from setting into fabric.
If the needle is off-center, adjust the height of the tube grip until the needle aligns properly. Use only slight protrusion of the needle past the tip at rest—excessive protrusion can cause issues during use. To ensure a comfortable hold, also consider adding grip tape before finalizing the wrap. Once you are satisfied with the alignment, tighten the grip screws or vise firmly, but avoid over-tightening, as this can distort the tube position. After tightening, recheck the needle’s alignment since shifting may occur. Ensure the grip holds the tube securely to prevent movement during use, and verify that the needle moves smoothly through the tube before proceeding.
Connect Clip Cord and Power Supply Before Testing
Connect the clip cord and power supply before testing to ensure proper operation. Start by checking your power supply configuration to confirm compatibility with your machine. Securely plug the clip cord into the power supply’s output terminals, making sure the polarity matches. A white stripe on the cord typically indicates the positive side, so connect it accordingly. Attach the other end of the clip cord to the machine’s rear binding post or frame hole, ensuring both connections are tight. Loose connections can cause power loss during operation, affecting performance. Use a voltmeter to verify actual voltage at the clip cord versus the power supply reading, ensuring voltage accuracy and consistency. Similar principles of consistent energy delivery apply to red light therapy devices, where stable power output is critical for effective skin treatment.
For reliable clip cord testing, it’s crucial that the cord is fully inserted into the power supply before energizing. This prevents intermittent contact that could lead to inconsistent power flow. Next, connect your foot pedal to the correct input, following the manufacturer’s instructions. Once everything is set up, perform a brief activation check to verify the electrical path from the power supply through the clip cord to the machine. This step confirms that the connections are stable and that power is flowing properly.
Tune Duty Cycle by Bending Back Spring
To fine-tune your tattoo machine’s duty cycle, start by understanding that the ideal percentage falls between 50 and 60 percent for smooth operation. Your rear spring controls this setting directly. Bending the spring upward increases its tension, which raises the duty cycle, while bending it downward decreases tension and lowers the cycle. The duty cycle reflects contact screw engagement, where a higher percentage indicates more contact.
If your duty cycle is too low, give the rear spring a slight upward bend. If it’s too high, gently nudge it downward. Make small adjustments—over-bending can cause internal stress and may lead to spring failure later. Many modern saddles come pre-set with an angle, so try to match your bend to this existing geometry rather than forcing the spring beyond its natural range.
Always verify your adjustment by observing the machine’s movement: it should be stable and even. Recheck the voltage and listen for consistent sound. Your goal is to achieve a machine that cycles smoothly and effortlessly, rather than hitting a specific numerical duty cycle percentage.
Tighten All Screws and Test Needle Motion Smoothly
Once all adjustments are complete, you need to tighten every screw and test the needle motion smoothly before powering on. Ensure all frame, post, and clamp fasteners are snug but not overtightened, as overtightening can strip threads or cause binding. Use the correct-size Allen key for recessed posts to avoid damaging the screw heads. Apply screw lubrication sparingly—just a tiny bit on threads—to prevent sticking without causing slippage. Using uniform screw types across the machine simplifies adjustments and reduces the risk of cross-threading.
Secure the contact screw without rotating it, aligning it precisely with the center of the armature bar; adding a plastic bead can help preserve the threads. Your needle gauge selection influences gap settings—use a dime-sized gauge for liners and a nickel-sized gauge for shaders. After tightening, check that the armature bar moves cleanly and strikes flat without scraping or wobbling. Power the machine briefly to confirm consistent cycling and listen for any rattling sounds. If the armature bar binds or wobbles at any point, revisit the alignment to ensure stability and proper operation, so your setup won’t falter under vibration.