DIY Tape-In Extensions: A Step-by-Step Guide
Looking to add volume and length with tape-in hair extensions? You’ll want to know the best way to apply them so they stay secure and look natural.
By following a few simple steps, you can achieve a professional-like finish right at home.
Keep reading for the full step-by-step process that will help you get flawless results.
How to Prepare Your Hair for Tape-In Extensions
To prepare your hair for tape-in extensions, start with a thorough wash using a clarifying shampoo. Use it twice if necessary to fully remove oil, dirt, and product buildup. Avoid applying conditioner because it weakens the adhesive’s grip. Stay away from heavy scalp treatments and deep-conditioning masks in the 24 to 48 hours before installation, as they create a slippery surface that can hinder the tape’s bonding. Also, refrain from coloring your hair within a week prior to installation, since fresh dye can interfere with adhesion. The derma roller uses microneedling stimulation to boost collagen, but tape-in extensions rely on a clean, residue-free scalp for proper bonding. For a seamless blend, position the tape 1-2 cm away from the scalp to allow movement and avoid discomfort. Knowing the correct placement prevents tension and ensures the adhesive bonds evenly across the hair shaft. Following proper aftercare, including allowing the adhesive to set for 24-48 hours, is essential for long-lasting results.
Dry your hair completely, then straighten it to ensure a smooth, even surface. Detangle thoroughly with a wide-tooth comb to remove knots and flyaways. Making sure your hair is clean, dry, and free of product creates the optimal base for tape-in extensions and helps them last longer. After the extensions are installed, avoid washing your hair for 24 to 48 hours to allow the adhesive to set fully. Using the proper removal tools later will protect your natural hair from unnecessary stress during the take-out process.
How to Section Your Hair for Tape-In Rows
Sectioning your hair correctly is essential for a seamless tape-in installation. Start at your nape, about 1 to 2 inches above the hairline, and create a straight horizontal parting. Clip the top hair out of the way, leaving a thin, natural layer above to help hide the tape extensions.
Take subsections that match the width of your extension strip, ensuring they are thin enough that your fingers almost touch through the hair. This precision keeps the rows flat and prevents bulkiness when applying the tape. For maximum hold and a natural finish, the adhesive quality of your tape matters just as much as your sectioning technique, similar to how the best gold ink tattoos rely on pigment density for lasting vibrancy. Space each row approximately half an inch above the previous one, working in horizontal tiers across the head. Use a brick-lay pattern by starting on one side and alternating on the next, guided by the position of your ears. Keep the back parting straight down the middle, whether you are working with a side part or a middle part. Using tight, narrow sections allows for better control of the bond area, reduces mistakes, and minimizes tension on your scalp. For optimal coverage, fill gaps between tapes in a brick lay pattern to ensure no scalp is visible and the extensions blend seamlessly. Understanding the tape-in system’s removal and reusability can help you plan for long-term maintenance and cost savings. Achieving this level of precision is similar to how red light panels deliver even coverage across a large area without creating hot spots.

STOP THROWING AWAY YOUR OLD TAPE IN EXTENSIONS - With Big Kizzy's "SNAP" Clips you can make a custom set of clip in hair extensions in a matter of minutes - no sewing required. The best part? With proper care they are reusable.

Remy Human Hair Extensions: WENNALIFE hair extensions are made entirely from remy human hair. The remy hair can remain ultra-soft, shiny, silky, and tangle-free throughout its lifetime. That’s the reason Wennalife tape in hair extensions are so natural and more comfortable.
The Sandwich Method for Tape-In Hair Extensions
The sandwich method involves placing a section of natural hair between two adhesive tape panels to create a secure and discreet bond. To do this, start with thin, clean sections of hair about 1 inch wide at your hairline, ensuring the tapes remain subtle. Position one extension tape close to the roots, then lay a thin slice of your natural hair over it. Follow by applying a second tape panel on top, pressing firmly to seal the bond. This technique helps distribute support across a broader surface area, making the extensions sit flat and blend seamlessly with your natural hair. To avoid visible gaps and keep the extensions lightweight, use a brick-lay pattern between rows, ensuring tapes do not overlap. This approach enhances durability and overall appearance while reducing tension on each strand. To adhere extensions securely without tension or pressure, use pincers to squeeze out oxygen between the tape layers. When it’s time for removal, always prioritize safe removal steps to prevent damage to your natural strands. Just as selecting high-quality tools ensures precision in professional tattooing, the same principle applies to the adhesives and applicators used here, as consistent performance hinges on reliable equipment. To maintain the bond over time, avoid oily products near the roots to prevent weakening the adhesive.

Natural Appearance:Tape in Hair Extensions Can Add Style And Volume To Your Hair With Natural And Discreet Results;By Choosing The Colour That Suits Your Hair Shade,You Can Enjoy Fuller Hair Without Anyone Noticing That You’re Wearing Hair Extensions

Tapes Specifications & Portable Packaging: Each tape measures 1.6 x 0.3 inches, suitable for most daily uses. Available in 24pcs, 48pcs, 72pcs, 120pcs, and 180pcs, with elegant, lightweight packaging to meet various needs

FAST-ACTING HAIR EXTENSION REMOVER: our hair tape in extension remover solvent is specifically designed to quickly and easily remove hair extension glue while being gentle on your skin and hair. Our oil-based rapid remover is suitable for sensitive scalps and will get your hair extensions to tape out without any pulling or damage. our adhesive tape in remover is formulated using citrus oils and extracts that will work on any style of tape in extensions or soft bonds
How to Seal Tape-In Extensions With Heat and Pressure
Once you’ve done the sandwich method, sealing the bond with heat and pressure can extend wear time up to 4 to 8 weeks. Using heat is optional; applying firm pressure alone can achieve similar results without risking melting the adhesive. If you decide to use heat, select a low-power heating iron or mini flat iron set between 120 and 150°F. Clamp down on the bond for no more than 2 seconds to avoid melting, then immediately follow with firm, even pressure. Start at the center of the bond, then press outward toward the edges for about 5 seconds. Consistent pressure is essential—gaps or uneven contact can allow moisture in and reduce the longevity of the extension. Remember, heat is an advanced technique meant to boost hold, not a shortcut for poor placement. Ensure your hair is fully clarified and dry before sealing to maximize the bond’s strength. To prevent bond degradation, avoid applying heat in a way that could cause adhesive melting, which ruins the structural integrity of the tape. Habits that cut lifespan short commonly include skipping regular refit timing or exposing bonds to heavy oils and conditioners. Derma rollers use micro-needling technology to stimulate collagen production, which can similarly help strengthen the hair follicle area for better extension adhesion.

Precision Styling for Short Hair, Pixie Cuts & Edges — Say goodbye to bulky flat irons that can’t reach those tricky spots. With ultra-narrow 0.3-inch plates, this pencil flat iron glides right to the roots, edges, and even men’s beards. Whether you’re touching up bangs, shaping a pixie cut, or taming baby hairs, you get salon-level control without the struggle.

Reusable And Invisible Tape: These Tape In Human Hair Extensions Come with Sticky Double-Sided Tape, Never Slip Or Become Losse Easily. Can Be Reused for Over 3 Months. Avoid Oily Products And High Temperature Near The Adhesive Tape

CONQUER HARD-TO-REACH EDGES: The exceptionally well-suited 3/10" ultra-thin flat iron design allows for meticulous root styling and a flawless finish without missing spots
How to Make Tape-Ins Look Natural at the Hairline
Placing tape-ins at least an inch away from the hairline is essential for a natural look. This prevents the bonds from becoming visible and keeps the extensions discreet. Use thin, clean subsections in a brick-lay pattern so each tape is fully covered by your natural hair. This staggered approach avoids straight lines from showing through your parting and creates a seamless blend. The use of stencil tattoo paper can help you map out the placement of subsections for precision and consistency. Beginners should consider using a wig cap as a practice guide for mapping out the brick-lay pattern before applying tape to the hair.
Matching the extension length to your own hair and trimming the front pieces to frame your face help with natural blending. Point-cut the edges to soften the transition and prevent the perimeter from looking stacked or artificial. Keep your overall hair density balanced so the extensions don’t appear heavier than your natural hair at the front. The double-sided medical-grade adhesive ensures a secure bond that is gentle on natural strands. Finally, style both your natural hair and extensions in the same way, ensuring the texture and direction match at the hairline for a truly natural appearance. To preserve the tape’s stickiness and extend the lifespan of the extensions, minimal finger contact should be practiced during removal and reapplication.

GREAT FOR FREQUENT CHANGES: 2 rolls of 1-in x 10-yds Nexcare Gentle Paper Tape (known in hospitals as 3M Micropore Surgical Tape) with a gentle adhesive that can be easily removed for minimal discomfort

MEDICAL TAPE: 2 rolls of 1-in x 10-yds Nexcare Flexible Clear Tape (known in hospitals as 3M Transpore Surgical Tape) with a transparent look for discreet bandaging of injuries

WATERPROOF: 1 roll of 1 in x 5 yds Nexcare Absolute Waterproof Tape with strong adhesive that stays on, even in water
Common Mistakes That Ruin Tape-In Adhesion
Placing tape-in extensions too close to your scalp is a common mistake that compromises adhesion. When the bonds are too near the scalp, they create tension and discomfort and are more prone to coming undone. Keep at least a quarter-inch of space between the bond area and your scalp to allow for natural hair movement and to avoid pressure that weakens the adhesive. Thick sections of hair also hinder proper sealing because the adhesive tabs need thin, even layers of hair to press against for a secure hold. Always section your hair into small, manageable parts for a cleaner, more effective application. This tension can also lead to traction alopecia over time, especially for those with fine or fragile strands. Using a bond remover specifically designed for tapes prevents damage during the removal process. If you’re weighing options before committing, note that tape-in extensions often require more maintenance than clip-ins due to this adhesive dependency and professional adjustment every six to eight weeks.
Chemical treatments and oils near the bond area are detrimental because they break down the adhesive’s glue fast. Avoid applying oils, serums, or chemical relaxers close to the bonds, ideally maintaining a clearance of at least half an inch. Environmental factors such as humidity and sweat further weaken the bond, so limit washing your hair in the first 24 to 48 hours after installation and avoid excessive heat styling that can cause the adhesive to soften and loosen.
Touching the adhesive tabs with oily fingers transfers residue, which reduces their sticking power. Always handle the extensions with clean, dry hands and refrain from touching the bonds unnecessarily. By steering clear of these common errors, you can extend the lifespan and security of your tape-in extensions.
How to Style Tape-In Extensions Without Pulling
To style tape-in extensions without pulling, start with clean, fully dry hair. Damp hair can cause slipping and make sections harder to control, increasing the risk of tugging on the tapes. For heat-free styling, try loose braids or twist-and-pull waves; these techniques add volume and texture without putting stress on the adhesive tabs. Always detangle gently using a wide-tooth comb, working from the ends upward to prevent snagging and dislodging the extensions. When blow-drying, direct airflow to the mid-lengths and keep the dryer at least six inches away from the tapes to avoid heat damage. For curls, clamp the iron below the tapes and wrap hair away from your face to minimize tension on the bonds. When straightening, use smooth glide motions only, making sure to never run the iron directly over the tapes. For updos, opt for loose half-up styles or braided fronts, which can conceal the rows without applying tight tension. Let curls cool completely before brushing to hold their shape and reduce the need for repeated pulling, helping the extensions stay in place and look natural longer. Choosing the right rotary vs coil tattoo machine can also help you avoid unnecessary tugging on any hairpiece during detailed styling work. Proper client and stylist practices include verifying that no sticky residue remains in the hair before any reapplication to ensure a secure bond. Following a thorough preparation routine before application helps the adhesive bond more effectively and reduces the risk of slipping during styling.
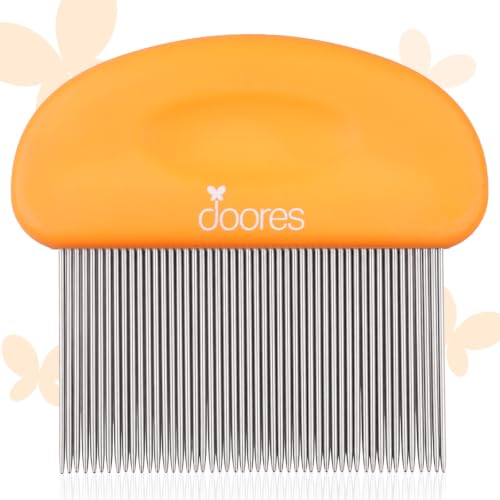
Versatile and Effective: Premium stainless steel tape-in removal comb can expertly removes adhesive residue after tape-in extensions removal, detangles knots effortlessly, precisely parts hair, and suitable for combing various hair types and styles

Easily Remove: WENNALIFE tape remover comb features ultra-fine rounded stainless steel teeth to gently remove sticky tape residue without pulling or damaging hair. Helps effectively remove adhesive residue from hair, leaving it smoother and cleaner after use
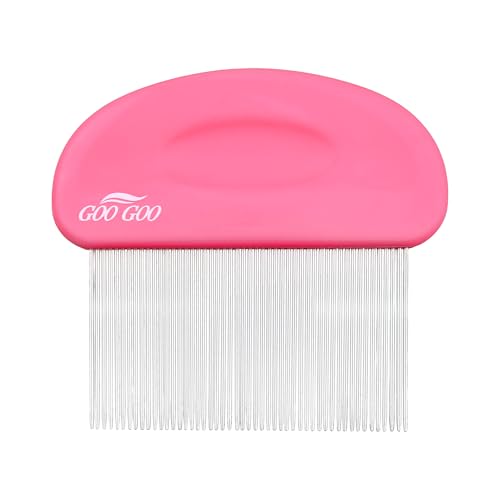
Professional Wig Adhesive Removal Tool: Featuring gentle rounded teeth that won't scratch wigs or tug at the scalp. Precisely cleans residual glue for safe and efficient use. Reusable without wear or damage, delivering a more comfortable experience.
Aftercare Tips to Keep Tape-Ins Secure for Weeks
After installing tape-in extensions, wait at least 24 to 48 hours before washing your hair to allow the adhesive to fully cure. During this period, avoid washing and excessive touching to prevent loosening the tape bonds. Once the waiting period is over, rinse thoroughly in the shower with your head upright, using only sulfate-free products to minimize product buildup and preserve the tape. Keep conditioners and oils away from the tape tabs to protect their adhesive strength; apply conditioner only from the mid-shaft to the ends. Use dry shampoo at the roots to maintain freshness and reduce scalp sensitivity between washes. Reapplication is typically needed every 4-6 weeks to prevent root damage and avoid excessive pressure on natural hair.
Brush your hair at least twice daily, supporting the tape area with one hand while gently working from the ends to the roots to prevent tension on the bonds. Never sleep with wet hair; always dry the roots within 30 minutes of washing to prevent mold and tape slippage. Avoid hot water and direct heat on the tapes, as high temperatures can weaken the adhesive. Tie your hair in a loose braid on a silk pillowcase to minimize friction. After swimming or heavy sweating, rinse your hair thoroughly to remove chlorine, salt, or sweat that could weaken the tape. Regular maintenance appointments every 6 to 8 weeks are essential to ensure the tapes stay secure and the extensions look their best.
How to Remove Tape-In Extensions Without Damage
To remove tape-in extensions without causing damage, follow a gentle, step-by-step process. Start by applying a tape-in remover, or a strong alcohol or oil-based solution, directly onto both sides of the tape sandwich. Use a rat-tail comb to create a small opening for the solution to seep in. Wait 30 to 60 seconds until the tape lifts easily; never try to force it free, as this can damage your natural hair. Once the adhesive begins to loosen, slide the weft apart gently. This method relies on a remover mix of alcohol and mineral oil to dissolve bonds with less fuss and mess.
If adhesive residue remains after removing the extensions, apply more remover or oil to soften it, then gently comb through your hair to lift away any leftover adhesive. After all extensions are removed, wash your hair thoroughly with a clarifying shampoo. This final step helps remove excess oil and residual adhesive, protecting your natural hair from breakage and buildup. Rinse well and condition as usual to restore moisture and smoothness.